Monday, July 15, 2013

Controlling two DC motors with Raspberry Pi and the L293D dual H-bridge motor driver


In order to move our Raspberry Pi powered rover, we will need at least two DC motors to power a left and right set of wheels. The motors will be used to move the rover forward and reverse, as well as rotate left and right.

To accomplish this, we figured out how to modify the DC motor tutorial on adafruit.com  to go from controlling one DC motor to two independent DC motors. Controlling two DC motors was accomplished with one L293D dual H-bridge motor driver chip, additional wiring configuration and code modifications.

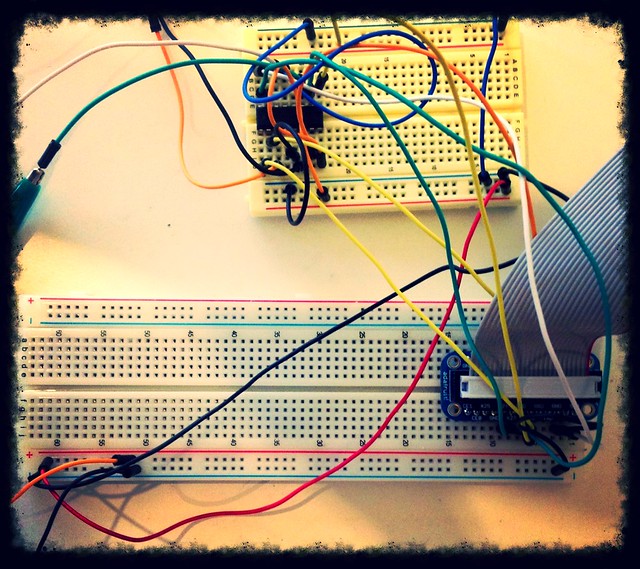
Let's first look at the L293D dual H-bridge motor driver and GPIO wiring:

In the above figure, all connections in blue and purple are used identically in the original tutorial which demonstrates how to control one DC motor.

Used to control direction of motor 1:
  • GPIO 4
  • GPIO 17
Pulse with modulation control (PWM):
  • GPIO 18
DC motor connections:
  • M1+
  • M1-
Power source connections:
  • Battery+
  • 5v Pi
Ground:
  • GND
The annotations in green are what was added in order to get the second DC motor to work with the shared L293D dual H-bridge motor driver.

Used to control direction of motor 1:
  • GPIO 23
  • GPIO 24
Pulse with modulation control (PWM): 
(NOTE THIS IS INTENTIONALLY SHARED WITH MOTOR 1!)
  • GPIO 18

DC motor connections:
  • M2+
  • M2-
Ground (not sure if necessary):
  • GND

At this time, we are using the PWM kernel module included in Occidentalis v0.2. This module is used to controll the rotational speed of the motors, which should both rotate at the same speed. Having both motors sharing GPIO 18 seems to work fine. The drawback of using the PWM module is that there is only one, and we cannot use it for both DC motors and servos. If we find that the default maximum speed of the two motors is fine, we may later free up GPIO 18 in order to add a servo.

Our large breadboard was getting messy from other projects, and this one requires a good amount of wiring, so I cleaned out everything from previous projects before starting this one.


I place the L293D dual H-bridge motor driver on a separate half-size bread board in order to keep all motor related wiring isolated on one board and left the GPIO breakout on the large breadboard (since we will be connecting more stuff to it later on).

Lets now look at the code. In order to have efficient code for the motors, I created a Motor class, so we can instantiate two motors with one class definition.

Motor class:


  1. class Motor(object):
  2.         def __init__(self, in1_pin, in2_pin):
  3.                 self.in1_pin = in1_pin
  4.                 self.in2_pin = in2_pin
  5.                
  6.                 GPIO.setup(self.in1_pin, GPIO.OUT)
  7.                 GPIO.setup(self.in2_pin, GPIO.OUT)
  8.        
  9.         def clockwise(self):
  10.                 GPIO.output(self.in1_pin, True)    
  11.                 GPIO.output(self.in2_pin, False)
  12.         def counter_clockwise(self):
  13.                 GPIO.output(self.in1_pin, False)
  14.                 GPIO.output(self.in2_pin, True)
  15.                
  16.         def stop(self):
  17.                 GPIO.output(self.in1_pin, False)    
  18.                 GPIO.output(self.in2_pin, False)


In the Adafruit tutorial, there is a helper function called set(), which I left as is outside of the class. I may incorporate it into a class later on, but I have not yet decided where it would best fit.

set() function:


  1. def set(property, value):
  2.     try:
  3.         f = open("/sys/class/rpi-pwm/pwm0/" + property, 'w')
  4.         f.write(value)
  5.         f.close()      
  6.     except:
  7.         print("Error writing to: " + property + " value: " + value)


Below is the main code that will pull it all together:


  1. import RPi.GPIO as GPIO
  2. GPIO.setmode(GPIO.BCM)
  3. left_in1_pin = 4
  4. left_in2_pin = 17
  5. right_in1_pin = 23
  6. right_in2_pin = 24
  7. class Motor(object):
  8.         def __init__(self, in1_pin, in2_pin):
  9.                 self.in1_pin = in1_pin
  10.                 self.in2_pin = in2_pin
  11.                
  12.                 GPIO.setup(self.in1_pin, GPIO.OUT)
  13.                 GPIO.setup(self.in2_pin, GPIO.OUT)
  14.        
  15.         def clockwise(self):
  16.                 GPIO.output(self.in1_pin, True)    
  17.                 GPIO.output(self.in2_pin, False)
  18.         def counter_clockwise(self):
  19.                 GPIO.output(self.in1_pin, False)
  20.                 GPIO.output(self.in2_pin, True)
  21.                
  22.         def stop(self):
  23.                 GPIO.output(self.in1_pin, False)    
  24.                 GPIO.output(self.in2_pin, False)
  25.                
  26. def set(property, value):
  27.     try:
  28.         f = open("/sys/class/rpi-pwm/pwm0/" + property, 'w')
  29.         f.write(value)
  30.         f.close()      
  31.     except:
  32.         print("Error writing to: " + property + " value: " + value)
  33.        
  34. try:
  35.         set("delayed", "0")
  36.         set("frequency", "500")
  37.         set("active", "1")
  38.         left_motor = Motor(left_in1_pin, left_in2_pin)
  39.         right_motor = Motor(right_in1_pin, right_in2_pin)
  40.        
  41.         direction = None
  42.        
  43.         while True:    
  44.                 cmd = raw_input("Command, f/r/o/p/s 0..9, E.g. f5 :")
  45.                
  46.                 # if enter was pressed with no value, just stick with the current value
  47.                 if len(cmd) > 0:
  48.                         direction = cmd[0]
  49.                 if direction == "f":
  50.                         left_motor.clockwise()
  51.                         right_motor.clockwise()
  52.                 elif direction == "r":
  53.                         left_motor.counter_clockwise()
  54.                         right_motor.counter_clockwise()
  55.                 elif direction == "o"# opposite1
  56.                         left_motor.counter_clockwise()
  57.                         right_motor.clockwise()
  58.                 elif direction == "p":
  59.                         left_motor.clockwise()
  60.                         right_motor.counter_clockwise()        
  61.                 else:
  62.                         left_motor.stop()
  63.                         right_motor.stop()
  64.                
  65.                 # only need to adjust speed if we want to      
  66.                 if len(cmd) > 1:
  67.                         speed = int(cmd[1]) * 11
  68.                         set("duty", str(speed))
  69.                
  70. except KeyboardInterrupt:
  71.         left_motor.stop()
  72.         right_motor.stop()
  73.         print "\nstopped"


download the code here

to run:
$ sudo python rover.py 

Command, f/r/o/p/s 0..9, E.g. f5 :f

f == forward
r == reverse
o == opposite directions
p == opposite directions
s == stop

CTRL-C gracefully stops the motors.

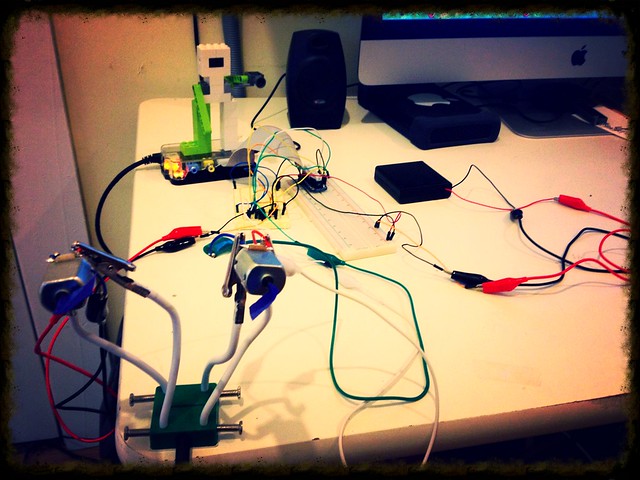
Here it is in action!

Coming soon. Web GUI driven DC motors...
Tuesday, July 9, 2013

Sidetracked: Using the light sensor on the Raspberry Pi - Talking Alarm Clock


One thing that came with my RasPi kit was the light sensor. Getting it to work was easy enough using this great tutorial on adafruit

After playing with the sensor with the example script, and figuring out the rc range of values that indicate that the light is on or off in my home office, I added some logic to print "THE LIGHT IS ON" and "THE LIGHT IS OFF".

OK that's good to know, but what else can I do with that information? Hmmmm. I know!

I decided to make a simple "alarm clock" in python which takes a time as an input on the command line, poll the current time every second, and trigger an alarm once the set time is reached. An alarm requires sound, and since we are building a robot, I thought I would play around with some text-to-speech software for the Raspberry Pi and use that as the voice to wake someone up (and we will use it for other things robot-related down the road)

After playing with a couple text to speech apps, I found that the best one for the Pi is espeak. One of the many things I like about espeak is its tun-ability (pitch/dialect/speed/etc..). One problem I found with running espeak on the Pi is that the words would slow down towards the end of long sentences (like TRON getting derezzed in the grid). I'm not sure if that is due to a CPU/memory resource issue with the Pi and sound driver, but I found a workaround for the slowdown by using an option in espeak which allows output to a wav file. The wav file sounds fine and has no lag, so my talking alarm clock will generate a wav file on the fly (with a random name) and play it with little or no noticeable delay.

I used the built in aplay  for playing the wav files. Aplay is part of the alsa sound driver tools on the Pi.

Where does the light sensor come into all of this? Oh yeah. The alarm clock won't shut up until you get up and turn on the light. Once the light sensor detects that the light is on, the alarm clock will deactivate. This will be great for getting my son out of bed when the school year starts back up in the fall!

Since I am delving into object oriented development, I made the following classes:

  • LightSensor
  • Voice
  • AlarmClock
The AlarmClock has-a voice and has-a light sensor and does all of the time keeping and triggering of the alarm.

An AlarmClock object can be enabled by calling the function AlarmClock.enable_alarm_<st|int>()


Usage: <executable> HH:MM
  • HH:     00-23"
  • MM:    00-59"
Here is an example of the LightSensor class:


LIGHT_SENSOR = 25 #GPIO PIN
class LightSensor(object):

        def __init__(self):
                self.rc_pin = LIGHT_SENSOR

        def rc_time(self):
                reading = 0
                GPIO.setup(self.rc_pin, GPIO.OUT)
                GPIO.output(self.rc_pin, GPIO.LOW)
                time.sleep(0.1)
 
                GPIO.setup(self.rc_pin, GPIO.IN)
                # This takes about 1 millisecond per loop cycle
                while (GPIO.input(self.rc_pin) == GPIO.LOW):
                        reading += 1

                return reading

        def light_is_on(self):
                reading = self.rc_time()
                if reading > 400: #value when light is off
                        return False
                else:
                        return True

light_is_on() returns True if the light is on, False if it is off.

My Voice class has two main methods that can be called by a program:
  • say(<string>) - say the string that is passed to it
  • say_cl(<command line string>) - say the output of the cl command passed to it. In my case, I used the classic UNIX program "fortune"
Code for everything would be messy to paste here, so you can get all of my alarm clock code on github: https://github.com/bugbiteme/alarmclock

The README file should tell you all you need to know to get it up and running!


Monday, July 1, 2013

Links for later

After posting the last article on reddit, a couple fine folks over there recommended using some other frameworks. I will definitely be taking a look at webiopi - link.

Just looking at some of the examples online, webiopi looks a bit easier than how I was approaching things.

I also found an example on how to use webiopi for doing almost exactly what I want to do!

At the same time, it's good to try and solve a problem with the tools and knowledge you have before doing things the easy way.